Introduction
To begin installation, you must setup the code on your developer machine and follow these instructions on how to setup the device.
Start by checking out the source code:
$ git clone https://github.com/mikaponics/mikapod-soil-arduino.git
Before we begin, these instructions assume you have basic knowledge of the Arduino platform. If you have no experience, please read the following links:
Configuring Hardware
To begin, please follow these instructions:
-
Attach the Sparkfun Weather Shield on top of the Arduino shield.
-
Connect the SparkFun Soil Moisture Sensor on top of the Sparkfun Weather Shield using the following schematic:
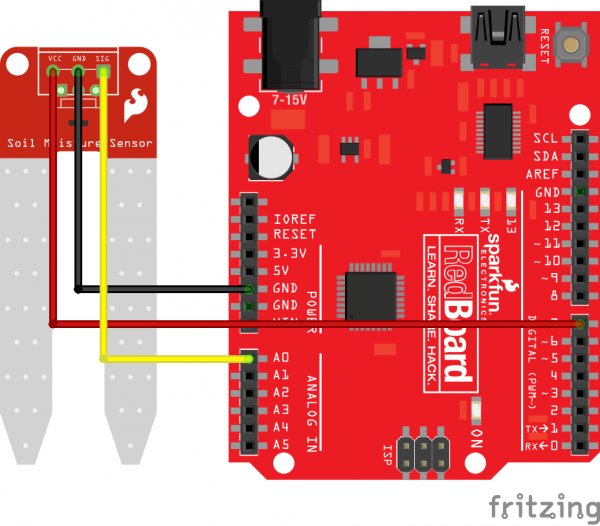
-
Once completed you should see something like this (see below).
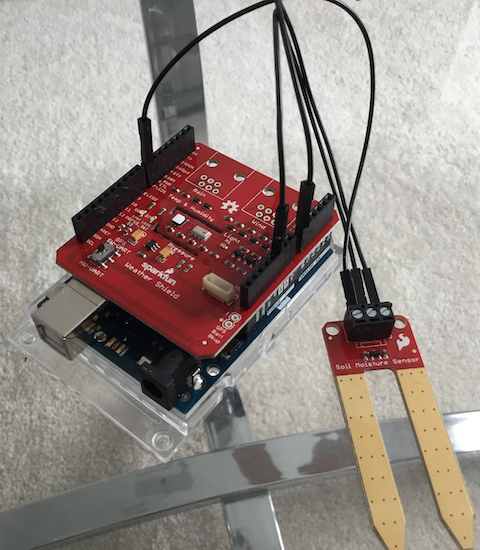
-
Connect the Arduino to your development machine using the USB Standard A-B cable.
-
On your machine, load up Arduino IDE.
-
Setup the connection according to your machine.
Configure Software
The following instructions explain how our application in the Arduino device.
-
Copy and paste the
mikapod-soil-arduino.inoto the Arduino IDE. -
Please install the following libraries using the Arduino Library Manager:
-
Click Verify and Upload. This will setup our Arduino device.
-
Let us confirm the device works. Load up the Serial Monitor in Adruino IDE. Once the conosle loads up, type in the number
1and hitenter, you should see the device return a JSON result.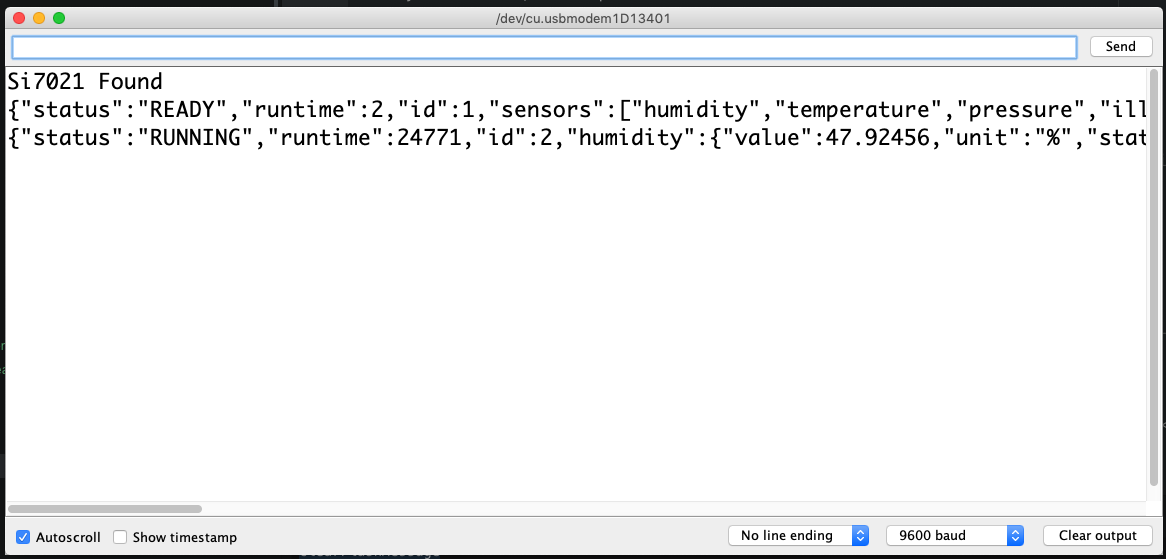
-
If you see something similar to the above then congradulations you have successfully installed Mikapd Soil for the Arduino.